【Contents】
1. What is a Multi-instance
2. Why use the Multi-instance function
3. How to start a Multi-instance
4. How to use the Multi-instance function
6. Synchronizer function introduction (click to jump)
1. What is a Multi-instance?
MuMu Multi-instance is a control software for managing multiple emulators, which meets the needs of users to run multiple emulators on one computer. You can create multiple emulators in the Multi-instance, run different accounts of the same game or different games on the emulators, and arrange the windows with one click to improve the gaming experience.
2. Why use a Multi-instance?
For individual players, whether you are playing multiple accounts in one game or playing different games on the computer, using Multi-instance can better improve your gaming experience. After opening more emulators, you can run the game in different emulator windows, check the status of all emulators running the game, and it is more convenient to hang up the game and farm materials, etc.;
For studio users, the cost of the real machine is high, and using multi-instance can greatly reduce the cost. MuMu Multi-instances run stably, which can help studio users better test games.
3. How to start a Multi-instance?
You can find the entrance to the Multi-instance through the desktop shortcut, the search application in the windows menu bar, and the toolbox in the upper right corner of any emulator. You can choose one of these commonly used startup methods. There are three specific operation methods:
First, the desktop shortcut starts "MuMu MultiPlayer 12";
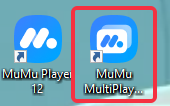
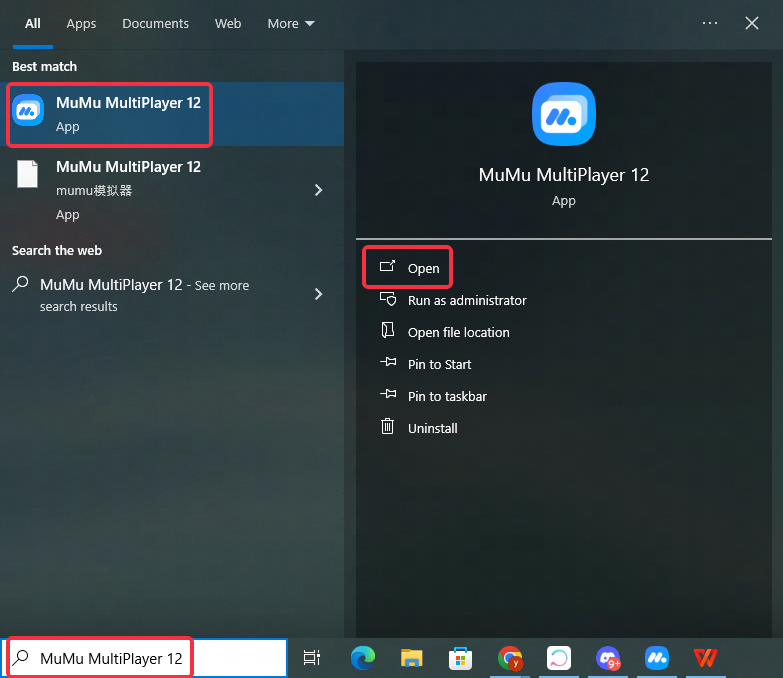
Second, search application in the windows menu bar;
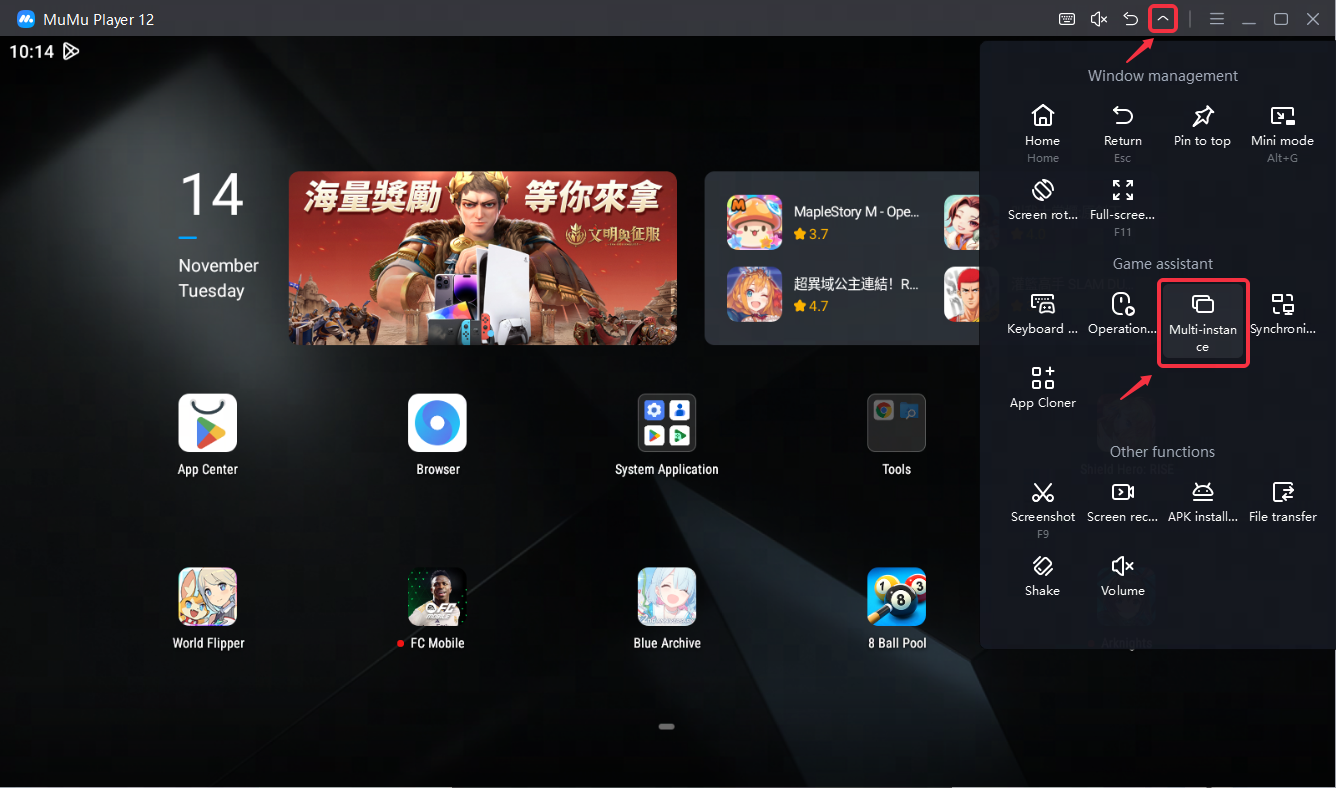
Third, start MuMu Player 12, click the "toolbox" icon in the upper right corner and find "Multi-instance".
4. How to use the Multi-instance function?
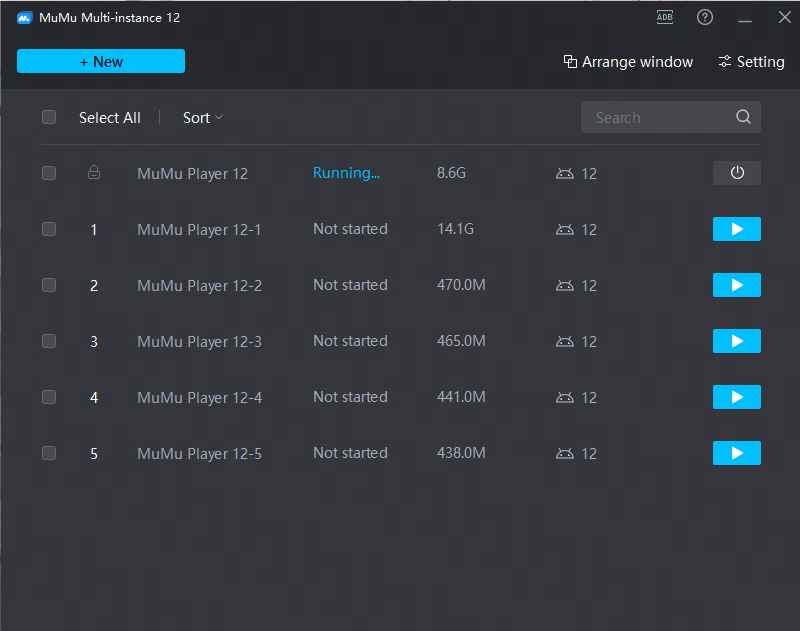
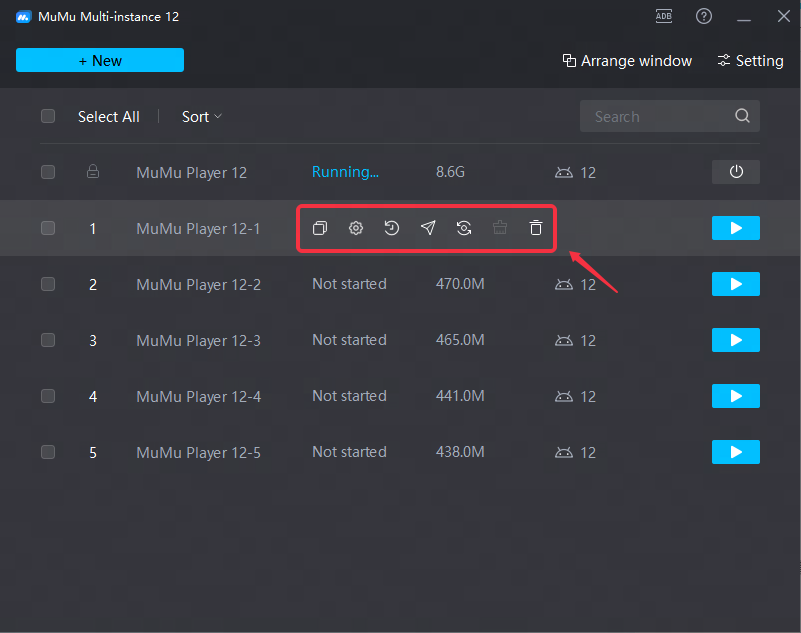
In MuMu Multi-instance 12, you can see the number of your current emulators, and you can also create, start/close, copy, backup, set, delete, create shortcuts, batch operations, search, and sort emulators, etc. You can arrange the windows of the running emulators so that the emulators can be evenly distributed on your computer screen.
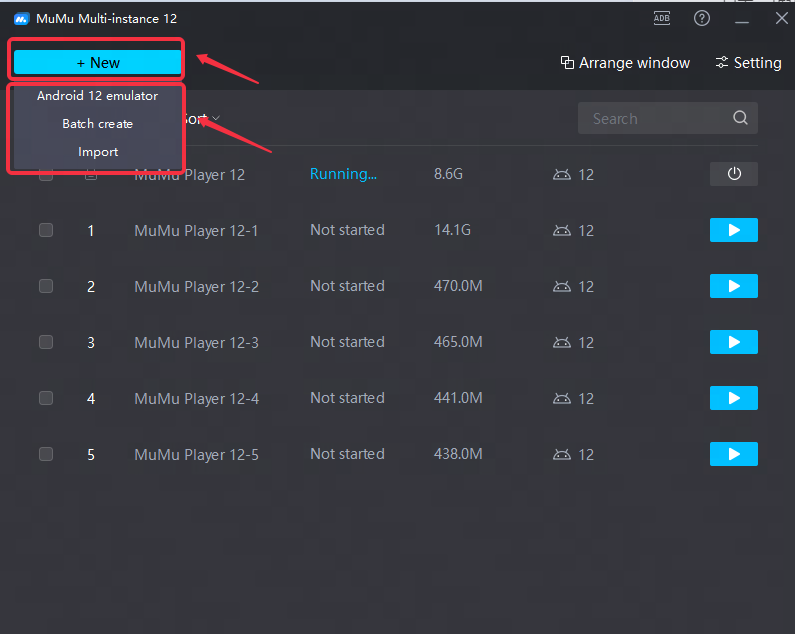
1. Create new
The ways to create a new Multi-instance include add new, batch/advanced create, and import.
Click "+New" - "Android 12 emulator", the default configuration will be used to quickly create a new Android 12 emulator in the Multi-instance list;
Click "+New" - "Batch create", you can customize the number of emulators, graphics card rendering mode, performance configuration, resolution and then create new ones;
Click "New" - "Import", you can select the data file with the suffix ".mumudata" to import and create a new one (the file suffix of the backup data saved using the backup function of the emulator is .mumudata).
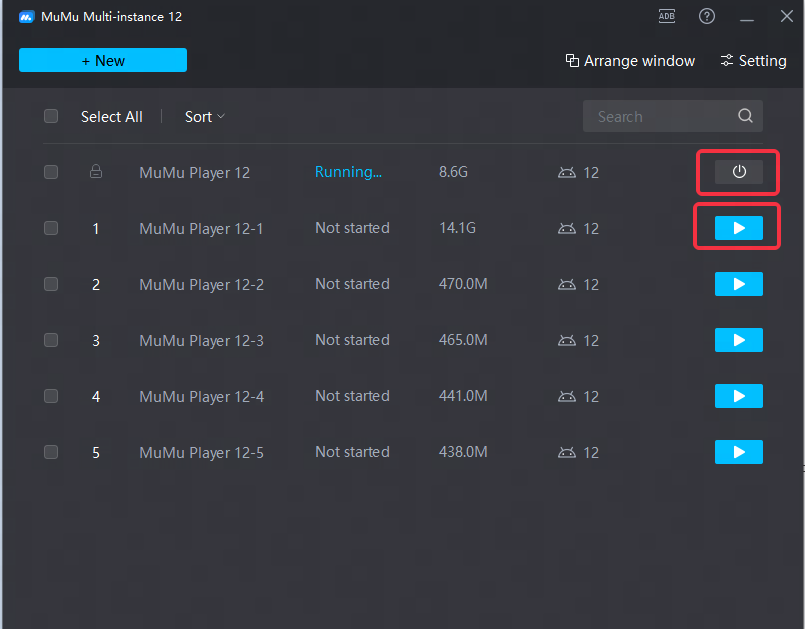
2. Turn on/off
In the Multi-instance list, you can directly close the running emulator or run the not started ones.
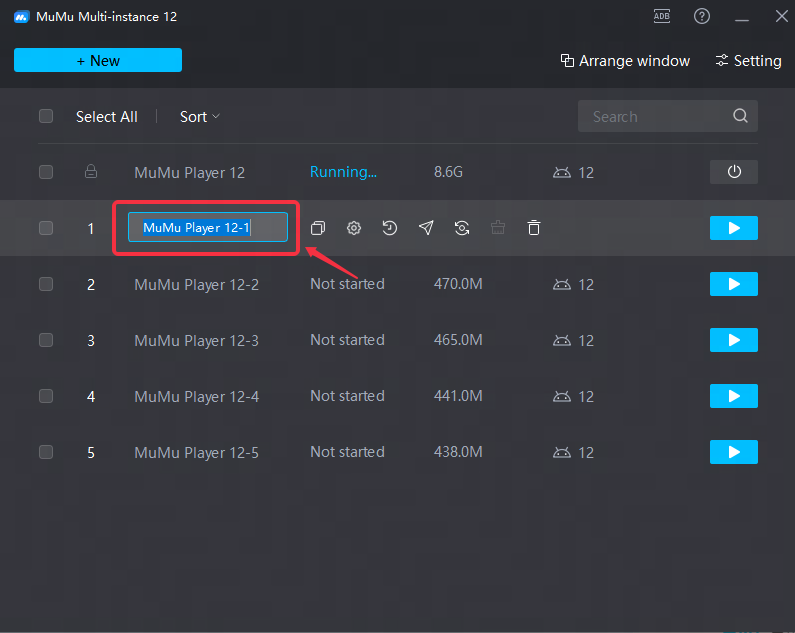
3. Rename
Customize the names of multiple emulators, which is convenient for distinguishing different emulators and managing multiple emulators.
4. Copy, backup, set, delete, and create shortcut startup methods (operable when the emulator is not started)
Copy: Copy all apps and their cached data in the chosen emulator and create a same new emulator;
Backup: Back up the data in the chosen emulator to the computer (the file suffix is .mumudata), then you can use the "+New" - "Import" function to re-import the data;
Settings: Set the performance, display, model, etc. of the emulator;
Delete: delete the emulator and emulator data;
Create a shortcut startup method: Create a shortcut startup corresponding to the emulator on the computer desktop to facilitate quick startup of the emulator (it is recommended to use a different emulator name in the Multi-instance list, because the name of the shortcut will directly follow the name of the emulator, if The name of the emulator is the same, and the newly created emulator shortcut will overwrite the previously created shortcut).
5. Batch operation
After selecting multiple emulators, you can perform batch operations on the selected emulators, and you can perform the following operations at the same time: start, close, set, copy, send to desktop, delete.
Start: Simultaneously start the selected unstarted emulators;
Close: Close the selected running emulator at the same time;
Settings: Simultaneously make settings changes to the selected unstarted emulators;
Copy: Copy the selected unstarted emulator at the same time;
Send to desktop: Create a shortcut startup method on the computer desktop for the selected unstarted emulator at the same time;
Delete: delete the selected unstarted emulator and emulator data at the same time.

6. Search
Enter keywords to quickly match the name of the emulator to find the emulator you want to start.

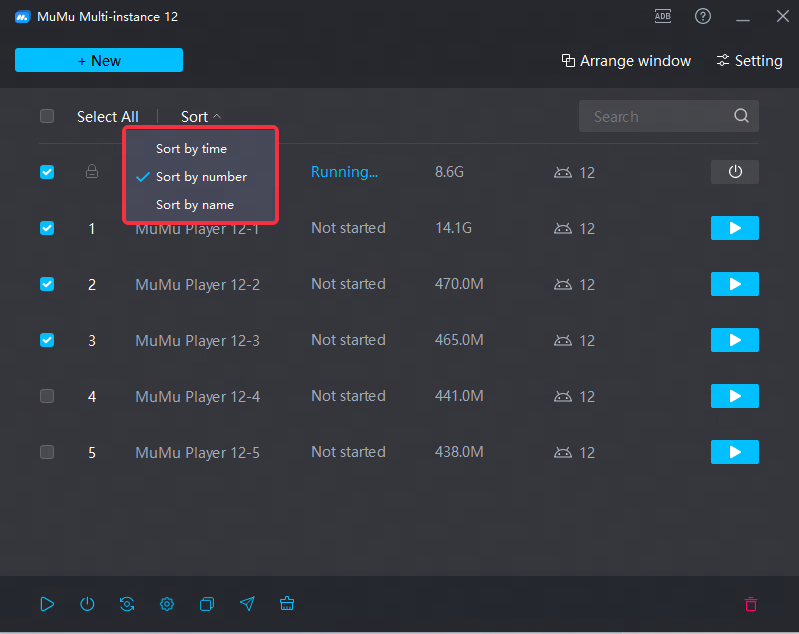
7. Sorting
The emulators in the multi-open list can be sorted according to your favorite way.
First, sort by time: the emulators are sorted in the order of creation time, the emulators created first are listed at the top, and the emulators created later are listed at the bottom;
Second, sort by number: sort by the number of the emulator from small to large;
Third, sort by name: sort by the name of the emulator.
8. Arrange windows
First, Grid arrangement:
1. Automatic arrangement
According to the number of running emulators and the size of the computer screen, an intelligent algorithm is used for optimal arrangement.
2. Custom arrangement
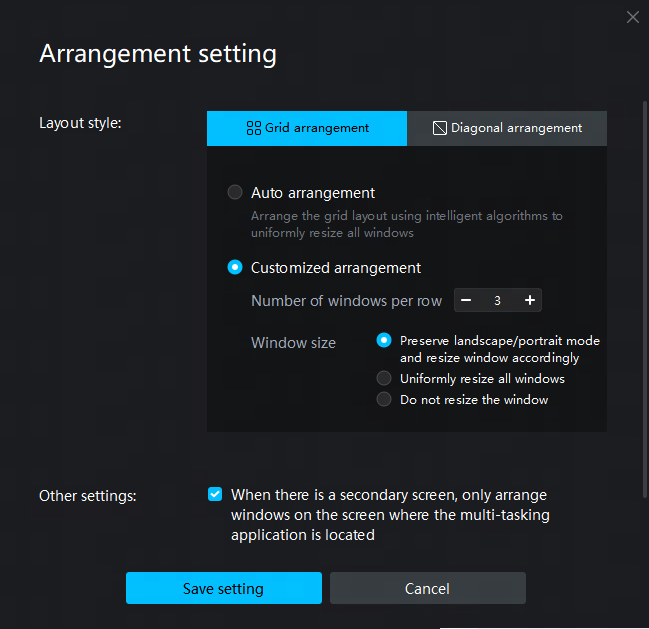
You can customize the number of emulators displayed in each row, and select the window size rule to arrange:
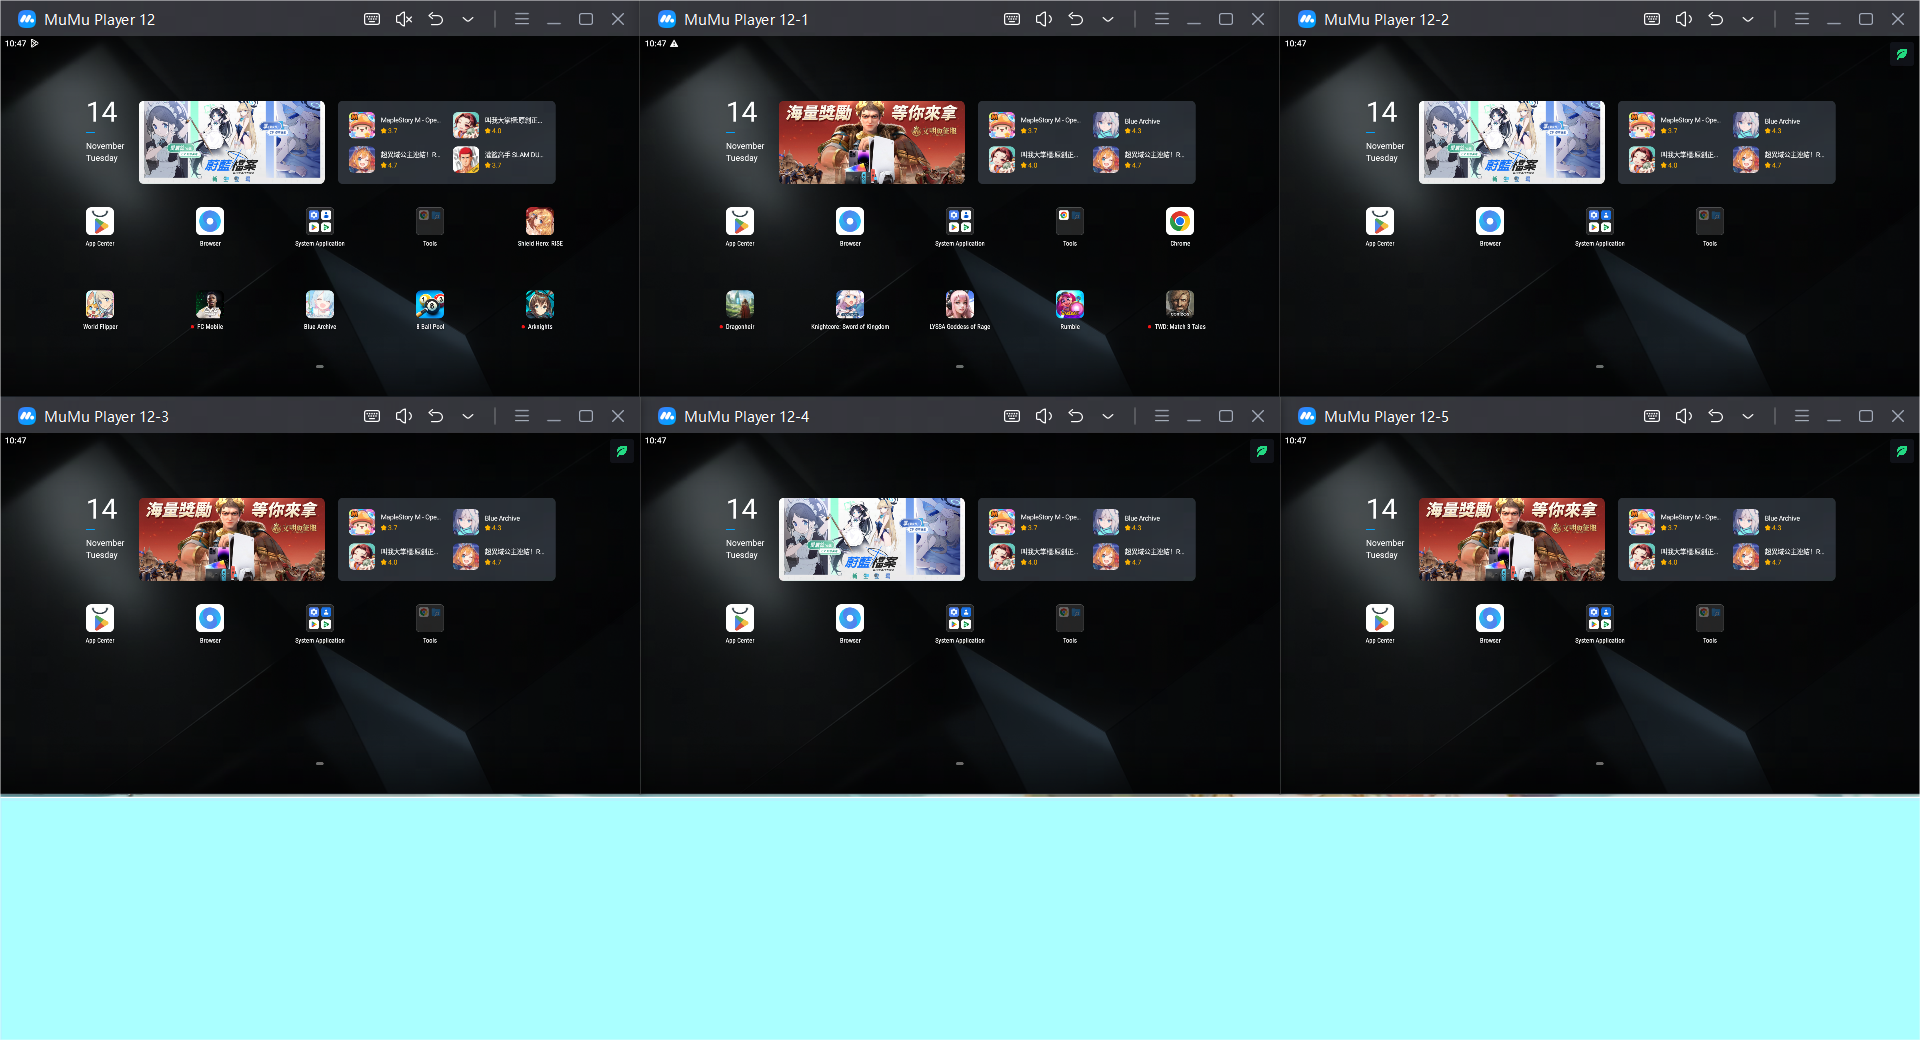
(1) Keep the landscape/portrait style to adjust the window size
According to the total number of emulators running/the number of emulators displayed in each row, the total number of displayed rows can be obtained, and the vertical and horizontal screen styles of the window before the arrangement will be retained, and the window size can be adjusted to allow all running The emulator in is displayed on the screen;
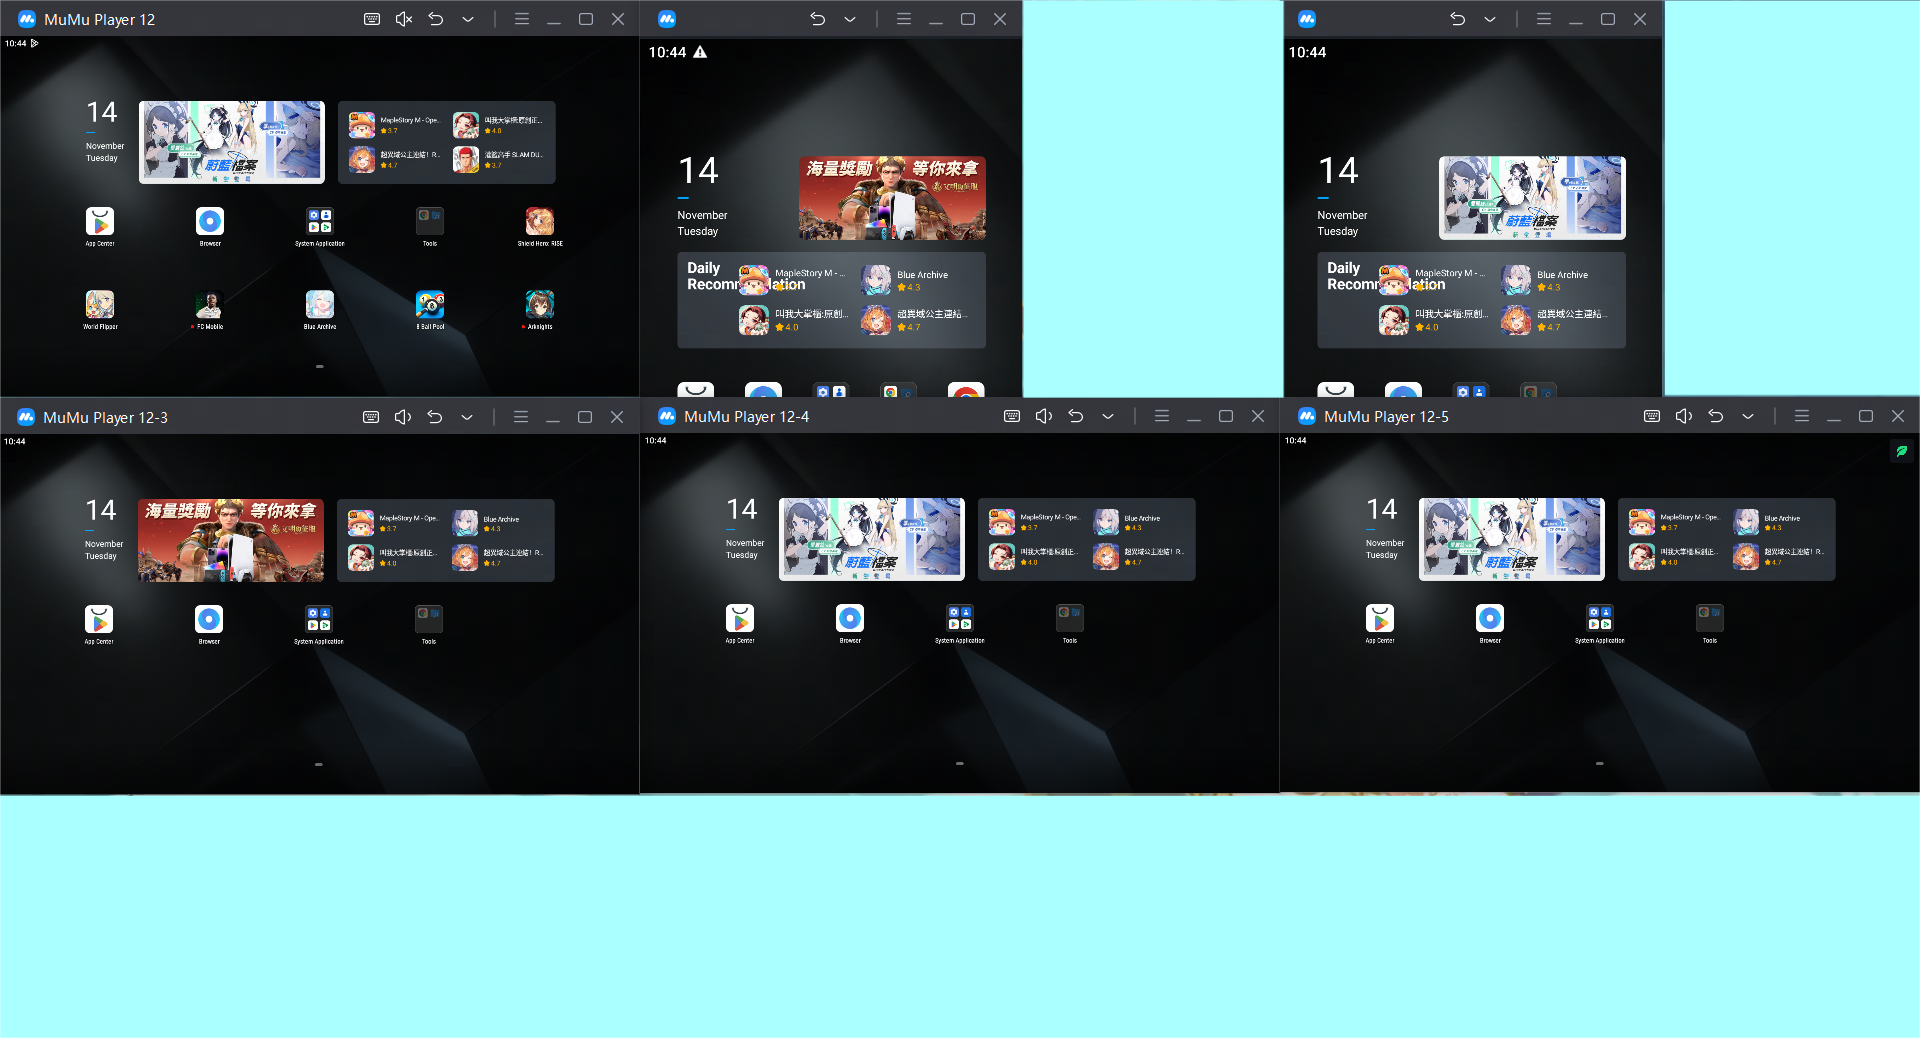
For example, the total number of running emulators is 6 (including 4 horizontal screens and 2 vertical screens), and when the number of windows in each row is 3, the display effect is as follows:

(2) Adjust all windows to the same size
According to the total number of emulators running/the number of emulators displayed in each row, the total number of displayed rows can be obtained. Confirming the arrangement will adjust all windows to the same size and display them on the computer screen in the form of grids;
For example, when the total number of running emulators is 6 and the number of windows in each row is 3, the display effect is as follows:
(3) Do not adjust the window size
According to the total number of emulators running/the number of emulators displayed in each row, the total number of displayed rows can be obtained. Confirm that the arrangement will retain the original size of the window and display it on the computer screen in the form of a grid;
For example, when the total number of running emulators is 6 and the number of windows in each row is 3, the display effect is as follows:
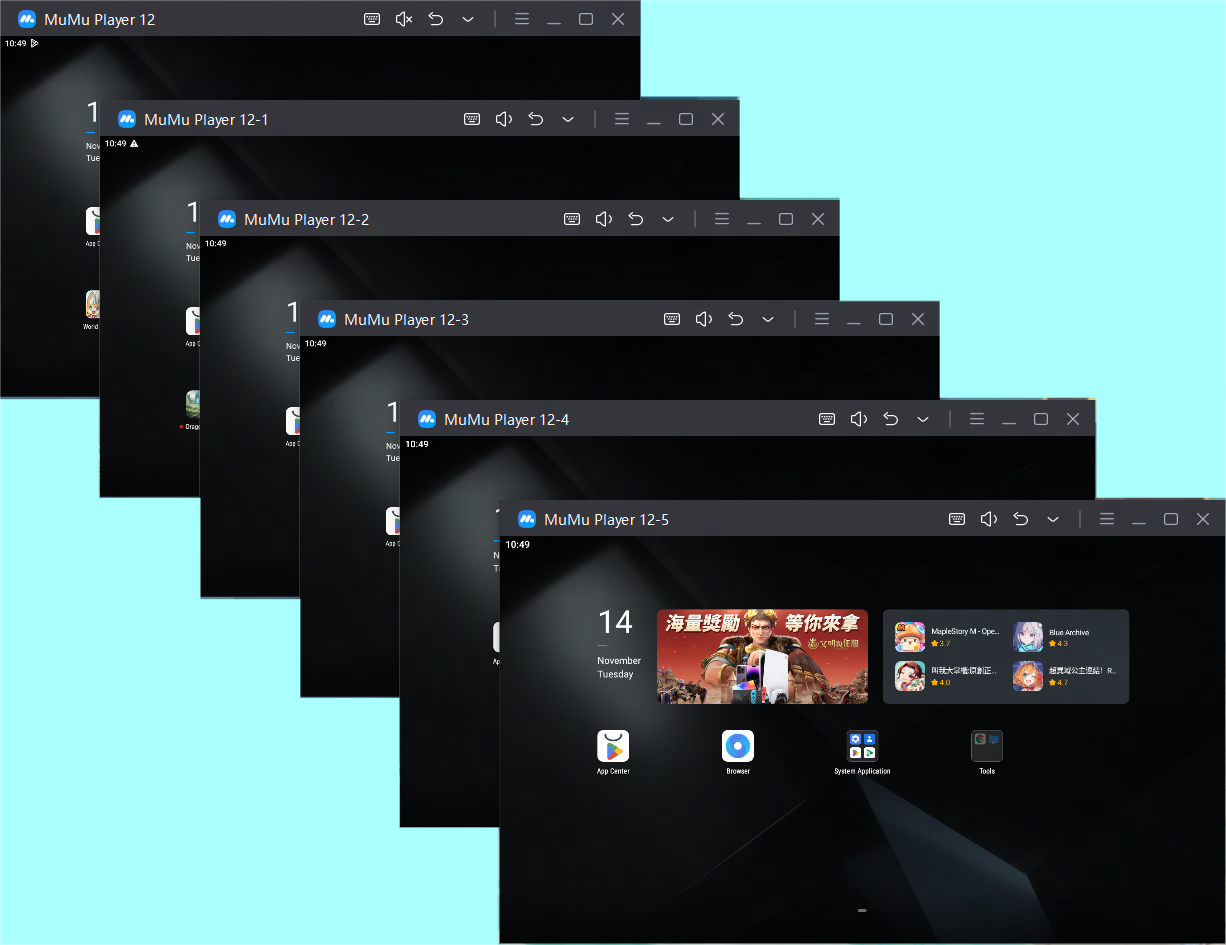
Second, diagonal arrangement
Confirm the vertex to start the arrangement and set the offset distance between the two emulators. Confirming the arrangement will display all the running emulators on the computer screen in a diagonal manner;
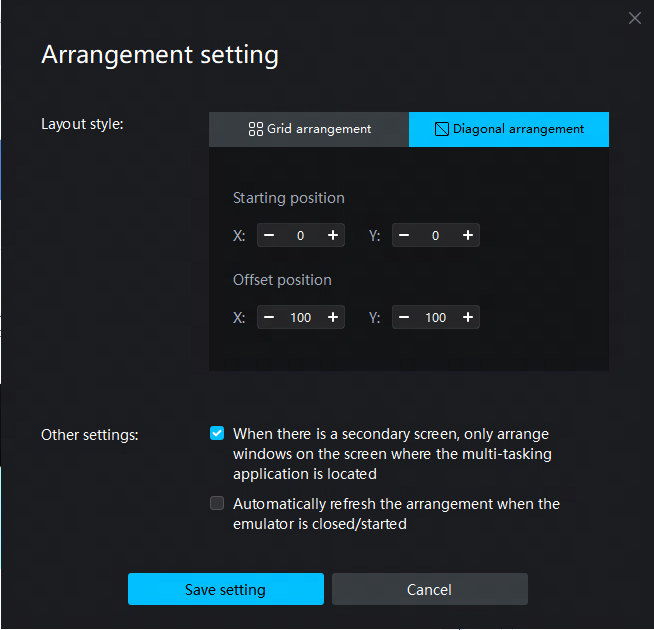
For example, when the total number of running emulators is 6, the starting position (0, 0), and the offset position (50, 50), the display effect is as follows: